
Writing and publishing your very first blog post is exciting. You finally have your website up and are ready to share your work.
But all that effort and excitement doesn’t matter if Google doesn’t know your content exists.
Why does this happen?
You have to follow certain key steps to inform Google that you have a new website and that you’re producing useful content. And you do this by taking specific steps, that is, by getting Google to index your site.
Keep reading, and you’ll learn all about indexing your domain and getting your first blog post visible to billions of people.
What Does Indexing Mean?
When Google (or some other search engine) indexes your website, it puts your pages in its search engine database. This makes it possible for people to find you through a search. They’ll enter a keyword, and Google will match the keyword to relevant content (hopefully yours), and your website might show up as a result.
So, indexing is the process of finding and organizing online content so that a search engine can generate the right results for a keyword.
You can wait for search engines to index your website on their own – and this could take weeks or months. But it’s better for you to actively index your website and take additional steps to make your content discoverable.
By submitting your website for indexing, you ensure that people find your first blog post fast. And this means more traffic, more sales, and more engagement.
12 Steps to Index Your Site and Make Your Blog Posts Visible
The good news is that indexing your website is relatively easy if you know what to do. And this is where this post comes in handy. I’ll share how to submit your site for indexing. And some other tips to make sure your blog post is visible and easily found by Google.
1. Check if Google Already Indexed Your Site
It’s worth checking if Google already indexed your website. To do this, simply type in site:yourwebsite.com and hit enter in your search bar.
If you see the list of pages that appear, it means that Google already knows about your domain. And you’ll also learn how many of your pages Google has indexed and crawled through.
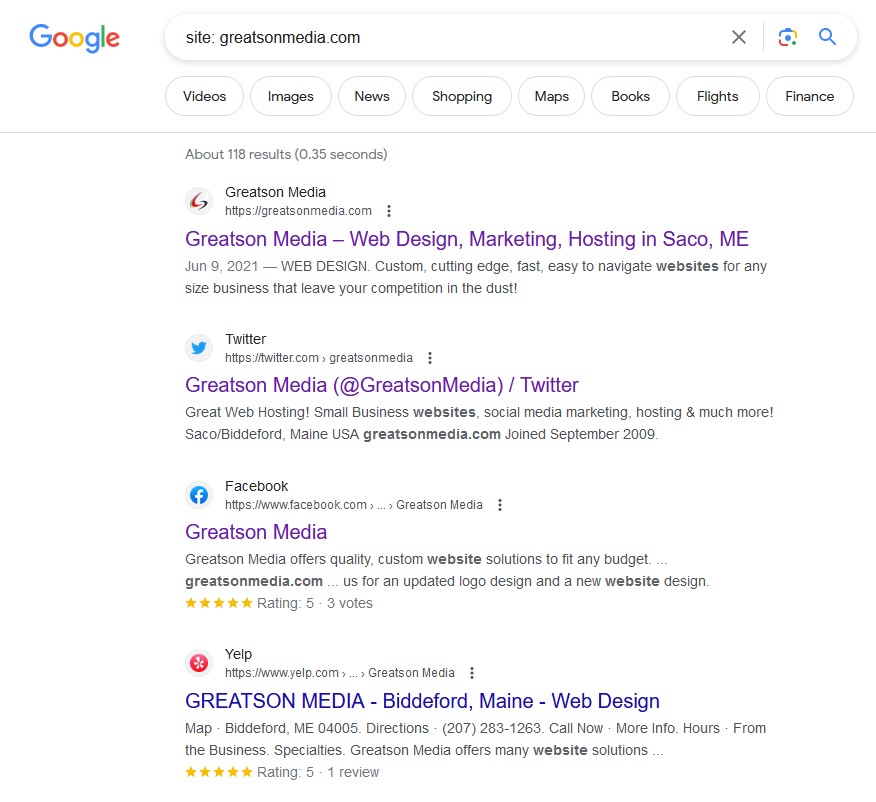
If you don’t see any results, follow through with the next steps.
2. Create a Sitemap
To start indexing your website, you need to build a sitemap.
An XML sitemap lists all the important pages on your domain. And it’s built using the XML or Extended Markup Language format.
This makes it easy for search engines to understand what your pages are about so that they can show the right ones for the queries people make online.
To create a sitemap easily, I suggest that you download an SEO plugin. A tool like AIOSEO will create your XML sitemap automatically when you install the plugin. You don’t even need to take an extra step to ensure that this process is handled.
You should know that if you have a WordPress site, that WordPress generates a sitemap automatically. You can check it by adding sitemap.xml/ at the end of your URL. For example, yourdomain.com/sitemap.xml/.
However, this doesn’t work all the time, which is why you should use a plugin to create your XML sitemap.
Finally, if you know how to code, you can create a sitemap by adding some PHP code manually to your site.
3. Submit Your Sitemap to Google
Once you have your sitemap created, it’s time to submit it for indexing.
To do this, you go to Google Search Console (GSC) and log in. Sign up if you haven’t already.
The side panel has a section called ‘Indexing’ under which you’ll find ‘Sitemaps’.
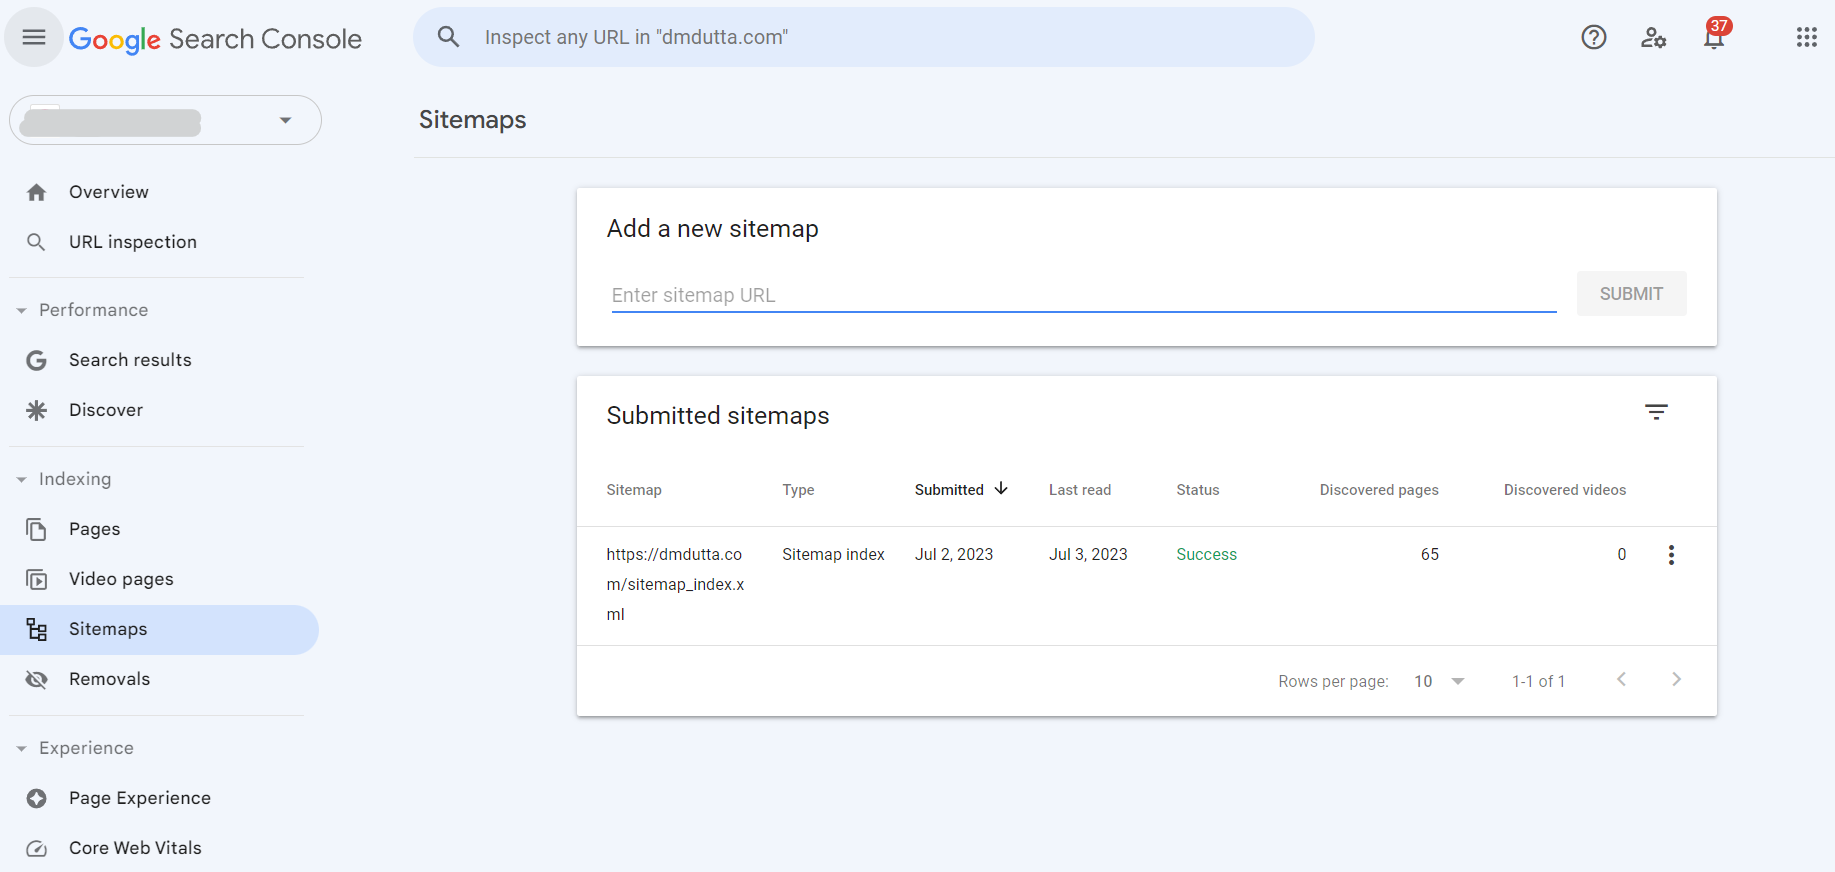
You can submit your sitemap under ‘Add a new sitemap’ and hit ‘Submit’.
You’ve started the process of getting Google to index your site right away.
Now, let’s look at other ways to make sure search engines find, understand, and organize your pages.
4. Remove No Index Tags
It’s possible that you added a NoIndex tag on your pages. This is an HTML element or meta tag that tells search engines not to index your page.
You can check the source code of your website and look for the <meta name=“robots”> tag. If it has an attribute that says ‘noindex’, then update it so that Google knows that it should include this page in its search results.
By optimizing your robots.txt for SEO, you ensure that your content is indexed.
5. Link Your Content Internally
Internal linking is the process of adding links to other pages on your site. This helps search engines understand which pages are related and that they should include them in their search results as well.
For example, if you write a blog post about SEO, you can link to other posts or pages that talk about SEO too. This will help people find more content, and it will also signal to Google that your content is important and should be included in its search results.
6. Remove Nofollow Tags from Content
One reason why Google may not be able to index your content is that you had a ‘nofollow’ tag on it.
This means that search engines are instructed not to follow certain links, which affects their ability to index the page. So make sure there’s no ‘nofollow’ tag on any of your content or pages.
If you’re using WordPress, you can just click over a link in the editing page or post and see if ‘nofollow’ is activated. Or you can use Google Search Console or your SEO platform like Ahrefs or Semrush, to find pages with the ‘nofollow’ attribute.
7. Check robots.txt for Crawl Blocks
The robots.txt file, also known as the robots exclusion standard, is a text file that tells search engines which pages they should not crawl through.
You can check your robots.txt file and make sure you don’t have an instruction to block Google from crawling certain parts of your website.
If you do, then simply remove that directive and submit your website again in GSC for indexing.
If it is blocked, it’ll look like this:
user-agent: *
Disallow: /
The Disallow section should not have any URLs that you want to be indexed in there. Delete them if they are.
8. Make Sure None of Your Pages are ‘Orphaned’
Orphaned pages are pages that have no links pointing to them. This makes it difficult for search engines to find and crawl your content.
There are many platforms that will help you check if you have orphaned pages. Some are AIOSEO, Screaming Frog, and others.
You want to add internal links from other posts or pages to make sure such pages are accessible.
This is an important step to make sure Google can index your content and show it in search.
9. Add Structured Data Tags
Structured data helps search engines better understand what your pages are about and how they should rank them in the SERPs. For example, if you run a food blog, there are specific schema markups that tell search engines the cooking time, prep time, cuisine, and so on.
There is also structured data for books, movies, and other information. Adding structured data will also tell Google that you’re providing high-quality content, making it more likely that it’ll appear prominently on search engines.
The best way to add structured data or schema markup automatically is to use schema plugins. This will allow you to focus on creating content and let the tool manage labeling your data appropriately.,
9. Promote Your Blog Posts
In addition to indexing, you should also promote your blog posts. Share it on social media like LinkedIn, Facebook and on forums.
And don’t forget to update your email list with new content. Such activities drive traffic to your site and signal that your content is valuable. This will also help increase traffic and engagement for your posts.
10. Block or Remove Poor Quality Content
This tip is useful for those websites that have many hundreds or thousands of pages. Apart from following the other tips mentioned here, you should also make sure that there are no poor-quality pages on your site.
This means making sure that any thin content, low-quality links, or spammy pages are removed or blocked so that search engines don’t include them in their results. And removing poor quality sites ensures that your good content is indexed faster.
11. Check for Duplicate Posts and Pages
Search engines will take longer to index your pages if they detect duplicate content. So make sure that you don’t have any duplicate posts or pages on your website.
Google will also not index a page if it is 99% the same as another. You may end up with duplicate content online if you syndicate your content. Or if some other party copies your work.
To deal with this, you can add the rel=canonical tag for your original posts. This informs search engines that content with this tag was the first to appear and that they’re the original content. It also enables syndication and reduces the chances that your content is penalized for being a duplicate.
12. Build Backlinks to Your Content
One way to help search engines figure out if your content is relevant and to ensure that your pages get indexed is to build backlinks.
Backlinks are links from other websites pointing to your content, which shows search engines that your content is valuable and relevant.
This will help them rank it higher on the SERPs.
Today, you can do this by submitting guest posts to sites that are willing to publish them. You can also answer expert panel questions and collaborate with other blogs and websites to send backlinks to your site.
In this way, your links appear where Google crawls already, and you ensure that it indexes your writing.
Conclusion
Getting your first blog post indexed by Google doesn’t have to be complicated or time-consuming if you know what to do. It only takes a few steps and some well-established content marketing practices like guest posting and internal linking to get Google to start indexing your content.
Follow the tips in this article, and you’ll be well on your way to having your blog posts appear on Google’s search engine results pages. So, start applying what you learned here and index your first blog post!
By Syed Balkhi